
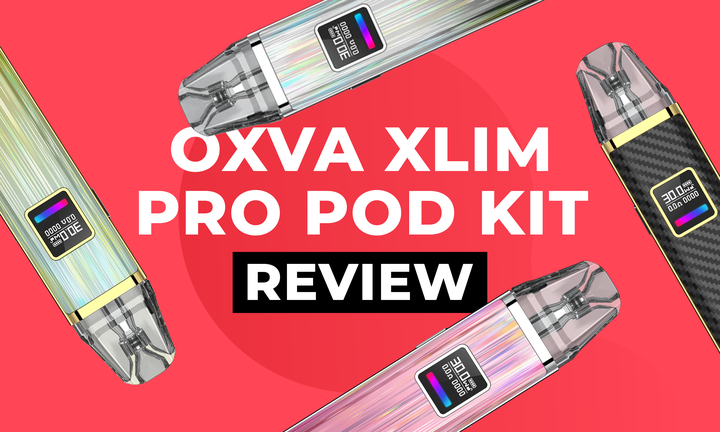
OXVA Xlim Pro Pod Kit Review
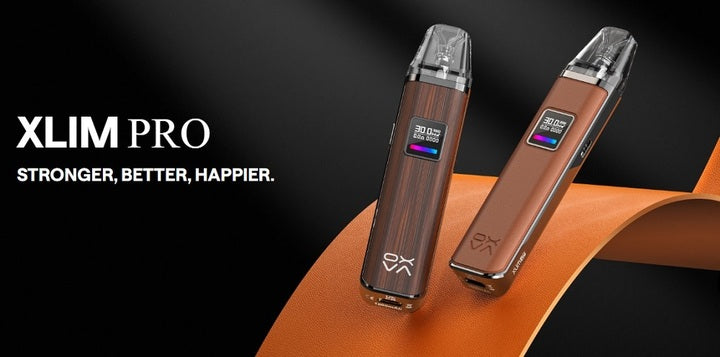
In this review I'll be discussing the OXVA Xlim Pro kit, the latest pod vape released by OXVA, an award-winning brand known for their high quality vapes. Hopefully by the end of this review you’ll know everything you need to about the Xlim Pro in order for you to decide whether or not it’s the right vape for you.
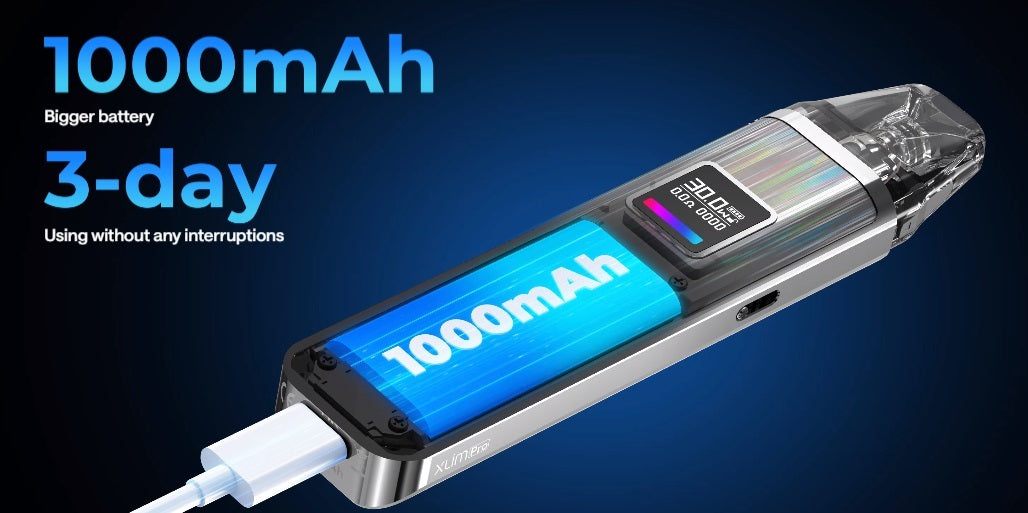
OXVA have made a name for themselves in recent years, releasing one premium pod system after another in quick succession. Each release has improved on the last, and the Xlim Pro is no exception. The Xlim Pro is the latest release in the OXVA Xlim range as is a slightly advanced version of the previous Xlim kit, appealing to both beginners and experienced vapers alike with its 1000mAh battery and impressive user interface - we’ll dig deeper into this later though.
However, even though OXVA produce some top-performers, that doesn’t mean that they’re without their flaws too, as you’ll find out later in the review.
OXVA Xlim Pro Specifications
Specifications
- Power Output: 5 - 30W
- Battery Capacity: 1000mAh
- E-Liquid Capacity: 2ml
- Adjustable Airflow: Yes
- Adjustable Power: Yes
- Weight: 66g
- Dimensions: 25.0 x 14.3 x 111.0mm
- Charging Type: USB-C 5V/2A
- Materials: PCTG + Zinc Alloy + IML
What’s included in the Box
- 1x OXVA Xlim Pro Device
- 1x Xlim V3 0.6Ω Refillable Pod (Pre-installed)
- 1x Xlim V3 0.8Ω Refillable Pod
- 1x USB Type-C Charging Cable
- 1x Lanyard
- 1x User Manual
It’s clear from the moment you take the Xlim Pro out of the box that the design and quality have received an upgrade - not a massive one - but enough that it’s clearly noticeable. Not only does the device feel a little heavier than the previous Xlim vapes coming in at around 66 grams, which makes it feel sturdier and more durable, but it also features a zinc alloy casing which gives the impression of solidity and class, as well as feeling nice in your hand.
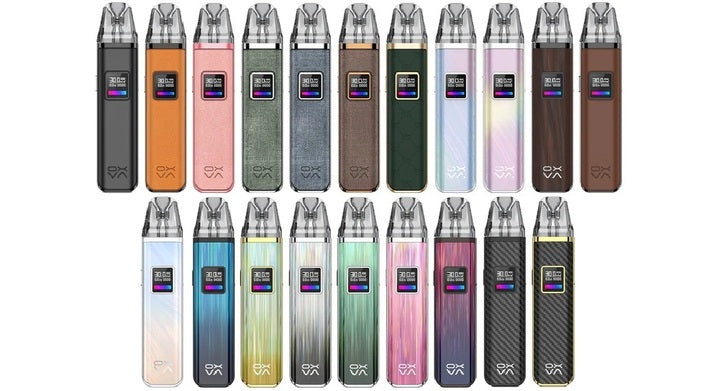
This isn’t the only part of the design that caught my eye though; there are more than 20 different styles available in the Xlim Pro, and each and every one that I’ve had the luck to test out had a fantastic finish. Although OXVA haven’t used genuine leather or wood in their designs, the quality is still phenomenal and doesn’t appear to be at any risk of peeling, fading or flaking - even after several weeks of hard use.
They’ve even incorporated some of the same gorgeous gleamy colours in their new release, this is great news for those who had a favourite colour in the previous generation as you can now get the same great designs in their latest vape!
That’s enough about all of the pretty colours though - what else is different about the Xlim Pro design? Honestly? Not much. The adjustable airflow slider is still located on the side of the device and works in the exact same way as previous models. The Pro also features the same USB-C type charging port at the bottom of the device for quick and convenient charging - unless you like to stand your vape up as it charges, in which case you’re unfortunately out of luck. On the plus side though, the device only needs to be charged every few days, depending on use, thanks to its 1000mAh battery.
The only real difference between the Xlim Pro and previous models is its slightly higher power output and the positioning of its fire button. The Pro can reach up to 30W of power, whereas the Xlim vapes before it could output a maximum of 25W; although 5W doesn’t sound like a tonne of difference, it sure does feel like it when you’re used to vaping at a low wattage. On top of that, the button used to activate the vape and switch it on and off has migrated to the side of the vape, rather than being in the middle of the device, as it has been on previous models.
With a multitude of different settings to play with - where should you start to really make this vape your own?
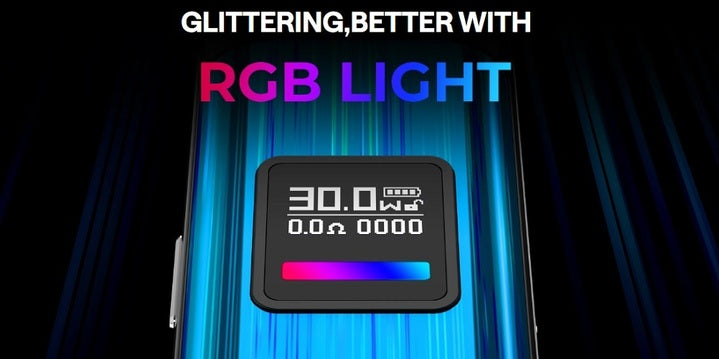
Well, firstly there’s the 0.42 inch screen; this screen allows you to view your current power output, battery life, how many puffs you’ve taken and whether or not the device is locked. The Pro Xlim does have a fire button, as I mentioned previously, but as the device is inhale-activated you do not actually need to hold the button in order to vape the device - just puff on the mouthpiece instead. The fire button is actually there for you to access a wider range of settings, such as the ones listed below.
- Power On/Off: Press the fire button 5 times
- Adjusting the Wattage: Press the fire button 3 times
- Lock/Unlock the device: Press the fire button 4 times
- Resetting the Puff Counter: Press the fire button 7 times
- Adjusting the RGB Lighting: Press the fire button 2 times
Adjusting the Wattage
To adjust your power level (wattage) you need to use the button that activates the vape (the one on the side) and press it three times in quick succession.
Although if your vape isn’t switched on already you’re going to need to quickly press this button 5 times first to turn the device on. If the device is switched on, go ahead and press the button quickly three times - you’ll notice that the numbers next to the W on the screen will begin blinking - this means that they’re ready to be adjusted.
Keep pressing the fire button until the number has reached the power level you want - although don’t worry if you accidentally go past it, as you can keep pressing the fire button and it will start over from 5W and cycle back through the power options after it reaches 30W.
The wattage increases in 0.5W increments, which can be a little slow if you just keep pressing the button - however, by holding the button down you can increase the wattage much quicker. A downside of upping your power this way though is that you might miss the power level you were aiming for and have to cycle back through.
Locking/Unlocking the Vape
To lock your device you need to use the same button that you used to change your settings, but press it 4 times instead of 3 or 5 - this should result in a locked padlock symbol showing on the screen. To unlock the vape, press the button another 4x quickly and you should see an unlocked padlock icon appear on the screen instead.
Resetting the Puff Counter
To reset the puff counter (shown at the bottom right of the screen) you’ll need to to press the fire button 7 times - make sure you don’t hesitate or pause whilst doing this, otherwise you may accidentally lock the vape or switch it off instead of resetting the puff counter, as I accidentally did.
Adjusting the RGB Lighting
To adjust the lighting pattern displayed on the screen you need to press the button 2 times - there are technically 4 different light patterns - although one of them is just ‘off’. The 4 different patterns you can choose from are:
- Light Off
- One colour light that moves (shows how much battery is remaining)
- One colour light with a pulsing/breathing patterns (also shows how much battery is remaining)
- Multicolour light that moves (doesn’t show how much battery is left).
I may be biassed, but although the RGB lighting is a nice touch, it doesn’t really add anything to the experience to enhance it, as the screen already displays the current battery level, and it makes sense to me that having the RGB LED active would just drain the battery quicker. That’s just my opinion though - others might find it a quirky little addition that adds character.
There were two V3 Xlim pods in the box, one that was preinstalled (0.6Ω) and a spare which was 0.8Ω. Both of these pods have a fill port located on the side of the pod, although they’re called ‘top fill’ pods, the location of the port allows for an easier refill as you don’t have to remove the pod from the device to top it up. The new OXVA V3 Xlim pods are also leak resistant, thanks to the placement of the fill port’s plug, and the pods come in an array of resistances which when paired with the adjustable airflow allow you to swap between MTL and RDTL vaping.
The 0.8 ohm pod that’s included in the box is better suited to MTL vaping than the 0.6 ohm, so should be used with a 50/50 VG/PG vape juice such as a nic salt or bar salt style liquid. The 0.6 ohm on the other hand is slightly more powerful and offers quite an impressive RDTL hit - so you could potentially pair with a thicker vape juice such as a 70% VG shortfill e-liquid if you wanted to - just make sure to open up your airflow to halfway or more or there might not be enough air coming through which could result in the vape spitting liquid back at you.
To use the V3 pods you’re first going to want to ‘prime’ them - this means to prepare the pod before you use it which reduces the risk of it burning or causing dry hits, as well as extending the longevity of the pod. To prime your pod you should place 4 or 5 drops of vape juice into the very centre of the pod where the cotton and coil are located. Allow the liquid to soak in for about 30 seconds before you then fill the pod with your chosen e-liquid - although you should wait another 30 seconds before you actually vape the pod, just to make sure the cotton is fully saturated and it’s ready to go.
However, if that sounds like a lot of hassle and you don’t feel like messing around with vape liquids or refilling pods, I’ve got good news. You can now purchase prefilled pods for the Xlim Pro - these pods contain 2ml of e-liquid and feature a 20mg nicotine strength. So if you’d rather opt for convenience over control, check them out.
There are currently 4 different pods in the Xlim V3 range that are compatible with the Xlim Pro OXVA - aside from the pre-filled ones. These include:
- 0.4 ohm - 26-30W (not included)
- 0.6 ohm - 20-25W (included)
- 0.8 ohm - 12-16W (included)
- 1.2 ohm - 10-12W (not included)

Regardless of whether I let the Xlim Pro’s SMART mode choose the wattage for me, or I set it myself - the device still exceeded all expectations. Rich flavour with the perfect amount of vapour and power - I really couldn’t complain.
I used the 0.8Ω V3 pod at 14W as I felt that this was a good middleground, and I also closed the airflow so that it was less than half open. MTL vaping isn’t my preferred style, but I have to admit that the 0.8Ω pulled it off well with a smooth inhale that was tight, but not too tight. The nic salt vape juice I used (Bar Series Pink Lemonade) came through quite well, and I was able to taste most of its complexity and different nuances - however, it just didn’t quite pack the punch I’d expected.
To make it a fair test I used the same liquid in the 0.6Ω pod too, and although there wasn’t a huge difference, it was still noticeable to some degree. I found that there was a slight boost in flavour as well as power and vapour production - this could be because I was using the pod at 22W, which is a bit of a jump at low wattages, especially compared to the 14W of the previous pod. Either way, I definitely preferred the 0.6Ω pod as it was better suited to how I like to vape and I felt it was a bit punchier.
One downside is that these pods do tend to guzzle through juice like there’s no tomorrow - this isn’t entirely surprising as they are only 2ml, but I had to top up each pod 3 times a day. Perhaps I vape a little too much, but still, it’s a good idea for you to keep your vape juice with you if you’re planning on going anywhere as you might have the same problem.
Unfortunately the 1000mAh battery did not last anywhere near as long as I’d have liked. Maybe if you use the 1.2Ω pod on its lowest wattage you’ll be able to achieve the fabled “3 days on 1 charge” that OXVA advertise. I, on the other hand, only managed around 8 hours of vaping whilst using the 0.6Ω pod on 22W and around 9-10 hours of vaping when using the 0.8Ω on 14W.
I’m not sure if the LED RGB light display affected the battery life in any significant way, but I’d recommend switching it off for maximum longevity if you’re okay with checking the screen every now and then instead. On the upside, the Xlim Pro did only take around 40 minutes to recharge, so the wait time wasn’t too long.
The RGB light can be useful for monitoring the battery though, if you’d rather not look too closely at the screen. There are 4 different colours that can be displayed, depending on how much battery you have left.
- Red means your battery is empty
- Light Orange meant that the battery was really low, and there was a significant drop in power at this point too.
- Blue meant that the battery was around half full.
- Green meant that the battery was above around three quarters full.
Pros & Cons
Pros
- Beautiful designs
- Sturdy, durable finish
- Fast charging time
- Flavoursome pods
- The side/top fill port was really easy to use
- SMART Mode so you don’t have to adjust your settings manually
- Compatible with other Xlim pods (not just V3)
- Easy to see whether pods need refilling due to transparency
- The adjustable airflow allows you to switch between MTL & RDTL
- Pods lasted for over a week each
Cons
- Battery didn’t last as long as advertised
- RGB Light seems a bit redundant
- Gets through juice quick
- Navigating settings can be a bit tricky with just one button
Overall I really enjoyed the OXVA Xlim Pro - but it could use a few little adjustments. The flavour from both pods was great, as was the vapour production and the overall performance. However, the battery life could be longer and I feel it would benefit from another button as using just the one for multiple settings can be a bit fiddly.
Although the pods get through vape juice quite quickly, I think this is just something we’ll have to take on the chin as it’s the price you pay for such good flavour and clouds of vapour. I’m delighted with the results of this powerful little pod kit and I can see myself using it for quite some time to come - I might just need to stock up on juice. Do you agree with the review? Let me know what you think of the OXVA Xlim Pro in the comment below!


